
How to create a Part in Epicor®
- Admin

- Apr 9, 2022
- 2 min read
Lets Start
Menu Path: Material Management > Inventory Management > Setup > Part
Enter or select the Part you need. If you are creating a new part, enter the identifier and its Description.

Click the Type drop-down list to specify whether this item is a manufactured, sales kit, or purchased part.
Manufactured – Indicates this part is a single item produced in your manufacturing center. You can configure manufactured parts.
Sales Kit – Indicates this part is included as part of a bundle, or a sales kit, of related parts. You can configure sales kit parts.
Purchased – Indicates this part is acquired by buying it from a supplier. You can configure purchased parts.
Select the Non-Stock Item check box to indicate this part is not normally stocked. You must select this check box to be able to configure the part. When you finish, click Save on the Standard toolbar.
The Part > Revisions > Detail sheet displays.

In the Rev field, enter a revision number or letter for the configured part.
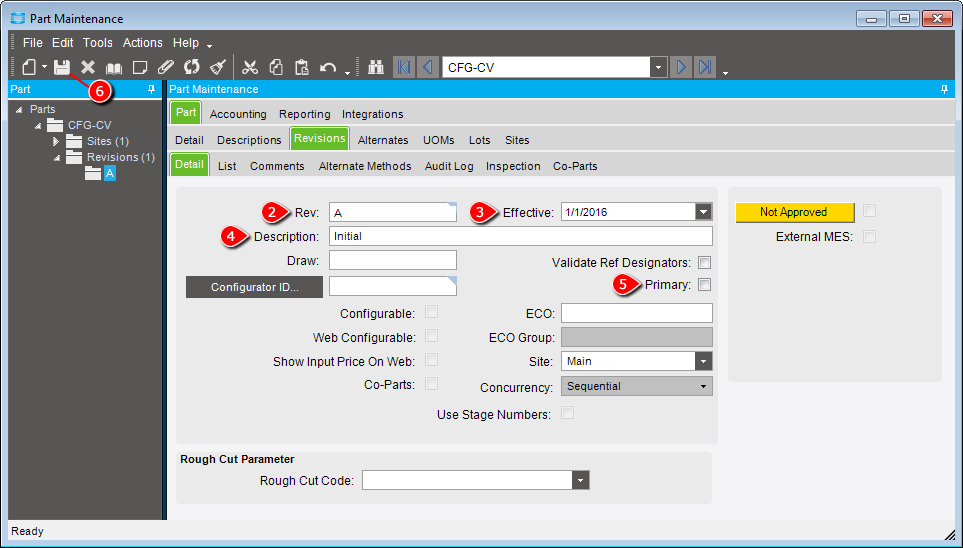
Specify the date on which this revision becomes Effective. The Epicor application uses this date to determine the default revision whenever you select a part. Engineering reports also use this date to determine current revisions in the bill of material.
In the Description field, enter a short description for the revision. Select this check box to mark the part in focus as a Primary part. Once you link a part to a Configurator
using the Configurator ID field and select this check box, the part you are linking the Configurator with 10.2.500 229
Epicor ERP Application User Guide Configurator | Chapter 5
will automatically default in the Configurator Rule Entry > Part/Rev > Part/Rev field when you search for and select the Configurator record.
Click Save on the Standard toolbar. You can now check out this part to an ECO group. Click the Actions menu, and highlight the Revision sub-menu.

Select Check Out Revision. The Part Revision Checkout window displays. Click the ECO button to find and select the ECO number to which you want to checked out the part revision.

When you finish, click OK.


Comments